
Simple Gluten Free & Vegan Bagels
Over the years I have purchased a variety of gluten free bagels & while none of them were bad I didn’t find that any of them had that amazon chewy texture that gluten bagels have. I actually can eat gluten (I didn’t for a number of years though) & my husband feels best avoiding it. So I have been able to compare regular bagels to mine. This recipe is spot on!! You will love them!
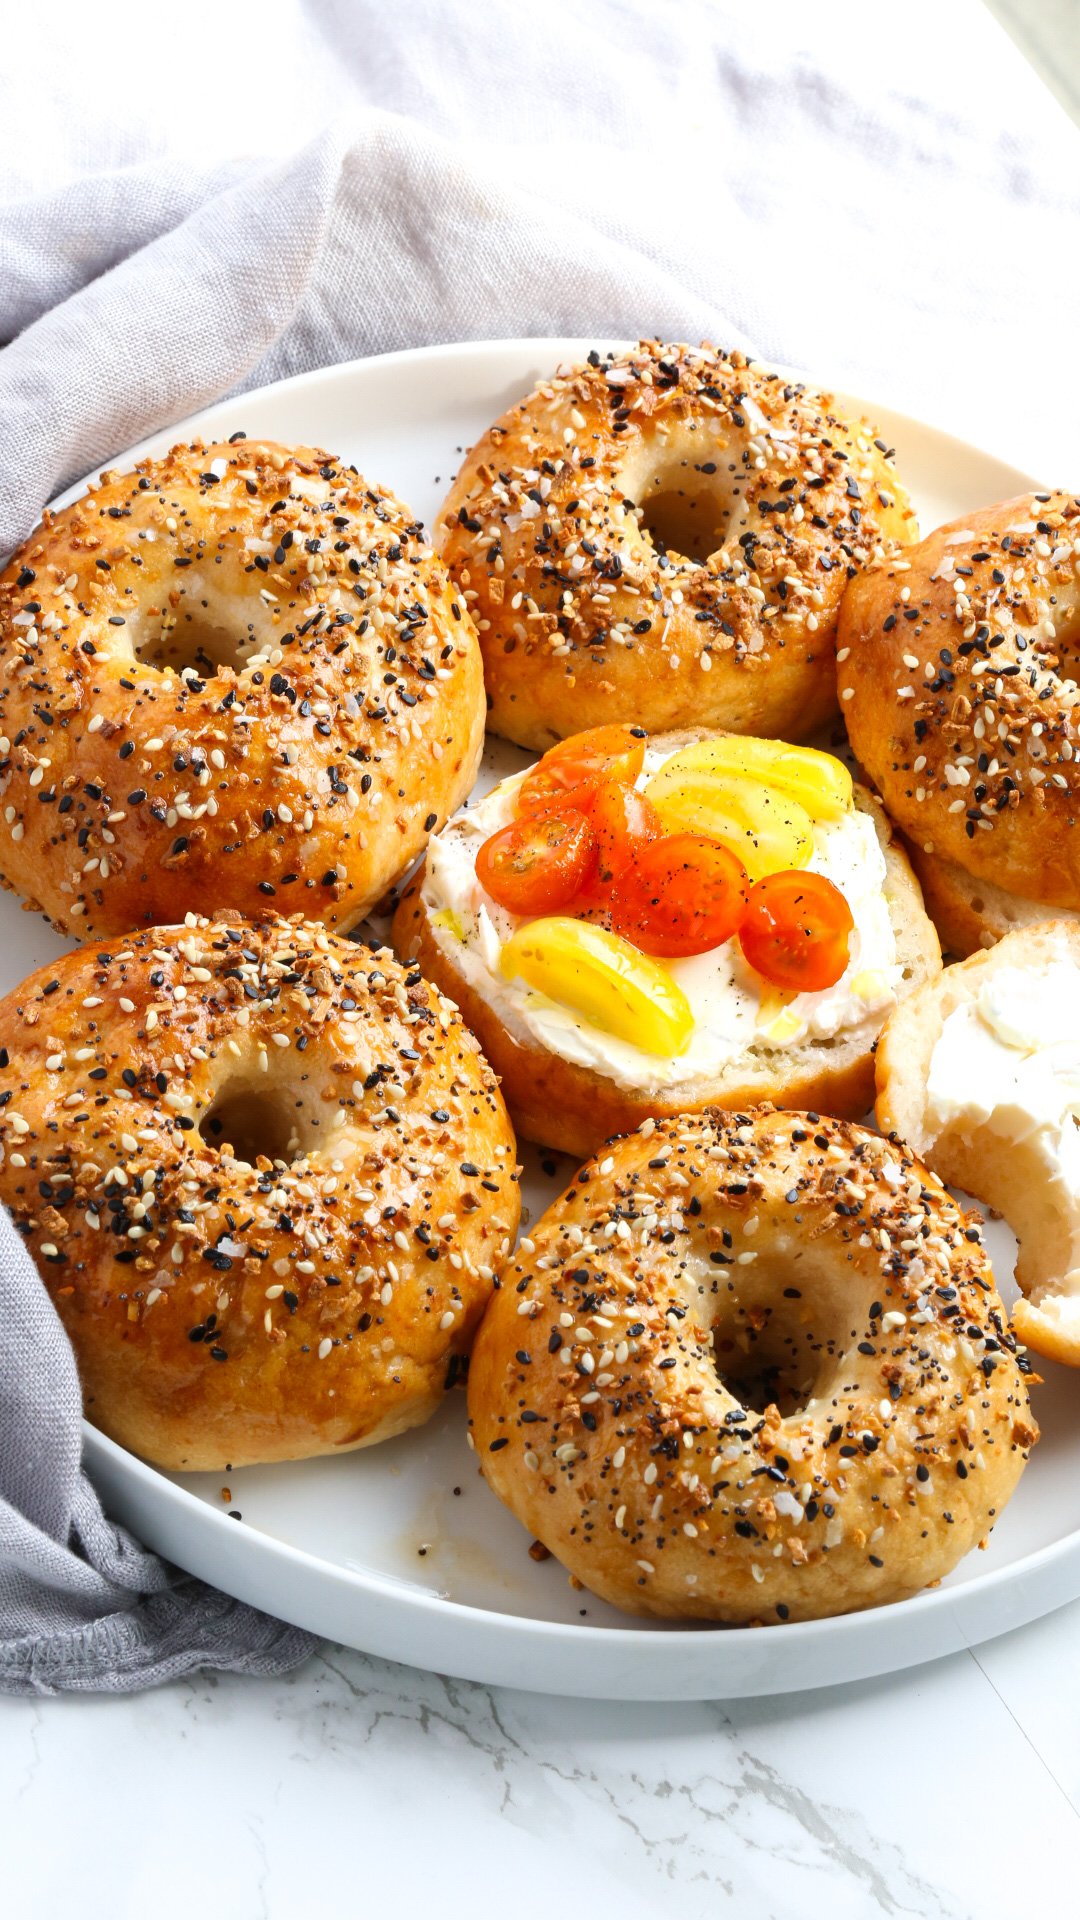
Chewy & fluffy with great bready flavor!! We really loved them toasted to make egg sandwiches.

Removing the bagels from the boiling water
Boiling the bagels may seen intimidating but I promise its really easy! I have one of those spider strainers/skimmers. Its perfect for gently lifting the boiled bagels out of the hot water. Using tongs probably will not work- as the dough could break! I would definitely buy a spider strainer or another small strainer to use or else you could run into issues.
Yeast
If you have not used your yeast recently (or its not new) and you would like to make sure its active then I would recommend warming your milk to a Luke warm temperature (no hotter) and mixing in the yeast and a portion of the sugar into it. Set it aside for 5-10 minutes. As long as it starts to bubble and froth you know its good to go.
I use my yeast often and know its alive and well so I skip this step and throw everything in the mixing bowl all at the same time.
Lets go over the ingredients!
Better Batter Gluten Free Orginal Blend
This flour blend continues to amaze me. It can do so many things better than most other blends that I have tried. As a result its extremely popular. Usually its available on Amazon and at Walmart. Lately I have been ordering it from the Better Batter website directly. When they sell out- they tend to restock pretty quickly. Check back within a day or two if they are sold out when you look. I buy it in bulk now (20 lbs at a time) as I cant risk running out. I use it in too many recipes that we love.
What if you cant get your hands on it? This may be the case if you live outside the US. My friend Nichole from Gluten Free on a Shoestring has figured out a mock recipe for better batter. Her version should work great in this recipe! The owner (Naomi) of better batter has confirmed that the mix is similar to the official version.
Expandex
This bread is truly only possible because of the magic of expandex. It is a modified form of tapioca starch that was formulated to improve gluten free baking. The word Modified tends to worry people- so let me explain further. Essentially they studied tapioca and removed portions of it leaving only the parts that would allow for it to cause amazing elasticity (aka its name) in gluten free recipes. This flour allows me to get an incredible rise with everything I use it in. It traps the air bubbles in the dough just like regular flour with gluten does! Its honestly incredible. If you eat any processed or store bought foods you have eaten many forms of modified starch. Its nothing new- its just semi new to the home baker. Its non gmo and I typically get it from the brand Judee’s on amazon. Under no conditions can you sub it out for another regular starch.
Outside of the US there is a product called Ultratex 3 I have not worked with it but from what I understand its comparable! I would use that in the exact same quantity as the expandex amount that I call for.
Superfine Rice Flour
There is a very very big difference between regular rice flour & superfine. Superfine is ground- well super finely. This changes the absorption abilities of the flour dramatically. So its very important to use superfine is its called for! If you want to save some money & have an asian market near you I have found their rice flour to be excellent! It will not be labeled as superfine but its ground as finely as superfine.
If you want to order it online- I would suggest the brand Authentic Foods. Brown or white superfine rice flour will work interchangeably in this recipe (and in most).
Superfine Brown Rice Flour: https://amzn.to/3jt1q5b
Superfine White Rice Flour https://amzn.to/3jrMSmv
Organic Cane Sugar- REAL Sugar is important. Its what feeds the yeast and makes this bread possible. I do not recommend swapping in a liquid sweetener as that could throw off the recipe. Please don’t use any keto sugars or even coconut palm sugar. It may not work as well.
Additionally its important to know that there is a difference in regular cane sugar compared to organic. Most of the time regular is ground MUCH finer which can really change the results of a recipe. The finer a sugar is ground the more moisture it adds to a recipe. I am in the habit of using organic so that’s what you will find in my recipes for the most part. Make sure its organic if you want to have the same results.
Yeast
Any brand will do for this recipe! Just make sure its labeled as Quick Rise or Instant (or any other words meaning the same thing!)
Double Acting Baking Powder
If you need to make these bagels corn free to use a corn free version of standard baking powder. I do not believe there is a corn free version available of double acting baking powder unfortunately. Double does typically work best- but these bagels will still turn out great even if you are unable to use it!

Gluten Free + Vegan Everything Bagels

Ingredients
Instructions
Notes
Yeast
If you have not used your yeast recently (or its not new) and you would like to make sure its active then I would recommend warming your milk to a Luke warm temperature (no hotter) and mixing in the yeast and a portion of the sugar into it. Set it aside for 5-10 minutes. As long as it starts to bubble and froth you know its good to go.
I use my yeast often and know its alive and well so I skip this step and throw everything in the mixing bowl all at the same time.
Proofing
When you proof the dough- it is not going to rise much if at all. That is ok! The goal is to help the dough develop some great bready flavor & to allow it to develop some air bubbles and yeast growth so that they bake properly.